- Home
- Custombikes
- Harley-Davidson
- Vintage
- 35th Anniversary Bike
#35THANNIVERSARYBIKE
The waiting is over!
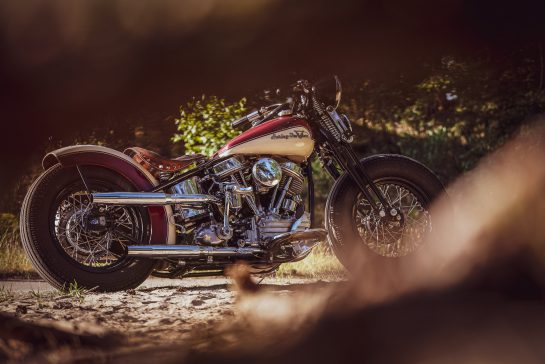
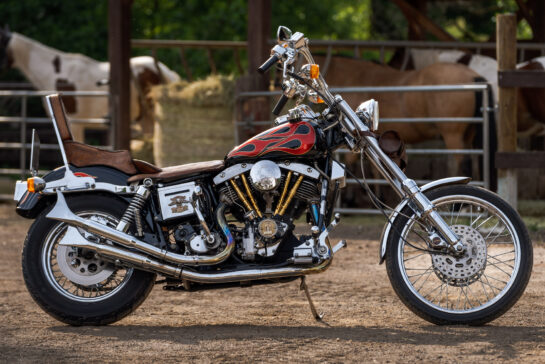
The waiting is over, here we present our anniversary bike!
Whoever has followed the making-of on our website can roughly imagine how much work has gone into it. And what should we say? We did it with pleasure!
One highlight follows the next. We are especially proud of our self-designed parts, like the oldschool jumping fork, the 5-spoke front wheel and countless other parts. Combined with the ones we made in classic handcraft, like the exhaust that runs inside the frame, we built a real firecracker for our 35th birthday.
The chopper is incredibly narrow: if you look away from the footrests, the bike measures only 45 centimeters at its widest point.
Our work is topped by the crazy paint in bright gold tones and the very fine details that our saddler and the engraver have contributed.
Some magazines will also present our anniversary bike in detail on paper and honor our anniversary with a small background story. Have a look at the magazine shelf!
We never get the shine out of our eyes!
The Pan lives and bubbles like no other.
The chopper passed the first test drive with flying colors and Andreas can’t get the grin out of his face anymore. Now the shooting is on.
We are curious what you say to our Golden Horse!
Fork Rough Assembly Part 1
Screeching machines, glowing chips, metal hits metal. Iron is brought into shape under heat and pressure.
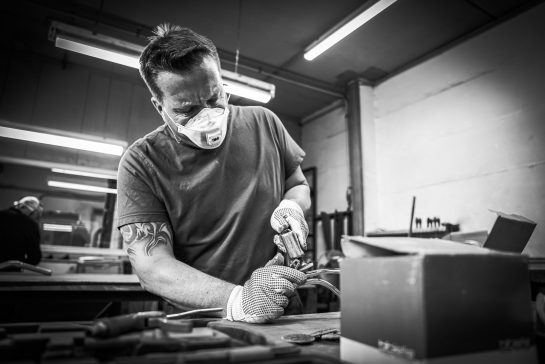
What sounds like a heavy metal music video is currently taking place in our production halls. For our 35th Anniversary Bike we have brought up heavy weapons.Where we used to machine aluminium, our CNC machines now work their way through hard steel.
The pictures will surely tell the experts among you what it is all about. And for all budding professionals – we build our own heavy duty Springer front fork.
Andreas had already hinted several times in the past that he wants to build something “really crazy” now,… and our showroom is already filled with some “really crazy” bikes.
But therein lies the idea and the “madness” of customizing. To implement something that no one has ever done before. From this idea the 35th Anniversary Bike will be developed in the coming weeks and implemented by the whole Thunderbike Team. You can experience it live in weekly steps, just like with our last big building project, the Emperor, for the King of Kings competition.
Once a rough draft of the bike is finished and the approximate dimensions are determined, such a large bike project always starts with the visualization on the computer. In this way the proportions and the later overall line of the bike can be determined in advance. Here, further detailed drawings can be gradually added at a later stage in order to be able to manufacture the individual components.
The necessary parts for the fork, apart from the springs, are completely manufactured in our halls. Initially, the triple trees are made of the same steel as the fork tubes. Steel has the decisive advantage of being twice as strong as aluminium. This is very convenient for us, because the wall thicknesses of the fork tubes can be kept particularly narrow. However, the manufacturing process is much more extensive. The milling machine alone requires four times as much time as machining a workpiece of the same size in aluminium. This is mainly due to the fact that the tool and the material to be machined have the same strength, which results in enormous friction. The resulting heat quickly brings the material to its load limit. Here it is necessary to work with calm and foresight to create the beautifully shaped parts from the massive block of steel.
Learn in the next step how the parts are assembled and welded together.
Fork Rough Assembly Part 2
The previously milled parts are joined and welded together in the next step. The finished Springer fork must have enough elasticity on the one hand, and of course enough strength on the other hand to withstand the extreme suspension forces. Therefore full concentration is required from the very beginning to ensure that all welding seams are meticulously even. The beautiful side effect is of course the noble appearance of the shapely seams
The previously milled parts are joined and welded together in the next step. The finished Springer fork must have enough elasticity on the one hand and of course enough strength on the other hand to withstand the extreme vibration forces. Therefore full concentration is required from the very beginning to ensure that all welding seams are meticulously even. The beautiful side effect is of course the noble appearance of the shapely seams.
During the planning of the triple clamp, small holes were planned in, which later serve as a starting point for welding. So the triple clamps can be connected not only to the fork plates, but also to the rigid fork assembly.
At the upper end of the main body of the fork, the spring holder, also made of steel, is attached according to the same principle and even pinned so that it can absorb more forces and is directly in balance.
The receptacles for the two movable short swing arms in the fork rocker later form the link between the two fork parts and hold the front wheel.
Learn in the next part how the fork development continues, as well as the rest of the bike construction.
Fork Rough Assembly Part 3
It’s a bit of a premiere, our first conventional Springer fork which is completely manufactured in-house.
From the planning to the finished product, we’ve opened all the registers of our skills.
The assembly is pretty straightforward, because all the fork parts fit together perfectly. This is where good pre-planning on the computer pays off and on the other hand our colleagues in the polishing shop grinded and polished all the surfaces of the parts with full dedication to high gloss.
With the Springer fork as an example, you can clearly see that at Thunderbike modern and traditional craftsmanship almost always interlock to meet our own high standards.
Many of you should already know where the journey of our 35th Anniversary Chopper is heading, it’s getting really oldschoolish.
Check back regularly to follow the next steps.
Wheel
Wheel Production
Nothing screams chopper like 5-spoke wheels!
Even 50 years after the start of this trend, the big star rims have lost nothing of their appeal.
Anyone who has followed the construction of the 35th Anniversary Bike so far knows that it is all about big dimensions. The long Springer fork will later carry a 23 inch custom made front wheel.
Build not bought – this is probably the most appropriate term for our newly designed front wheel, because there is not a single wheel on the accessory market that meets the required standards.
As a starting point we use the original front wheel of a Harley-Davidson Rocker, which our CAD designer and constructor Andre transferred virtually into the computer and adapted to all our requirements. By the way, the original wheel is still in use and serves as a new, rebuilt rear wheel for the project bike.
In the next step, the newly designed rim is machined from the billet in our in-house production. This requires good preparatory work, because the data from the CAD sketch must be converted into work commands for the machine. The machine, which is mounted in 5 axes, performs more than 100,000 work steps and needs about 40 hours to produce the wheel.
Thanks to our own production facility we can of course determine the exact dimensions so it’s possible to plan for a reasonable double disc brake setup. Furthermore, the wheel gets a free standing hub and folded rim edges, in which the casing can be clamped later on. The tire must be driven with 4 bar air pressure to prevent the tire from slipping off the rim. This is also where the type designation of the tyre comes from: Clincher tyre from the English to clinch.
To round the production process off, the rim is polished to a high gloss and will be a further highlight besides the fork.
Fuel Tank, Engine Bracket, Engine
Fuel Tank, Engine Bracket, Engine
Meanwhile it will be clear to anyone who has followed the construction so far that our 35th Anniversary Bike is becoming really old school. 5 spokes front wheel, Springer fork and of course the drive is to be taken over by an appropriate unit from Harley history.
Andreas has spent a long time studying the different engine generations for the project bike. Flat-, Pan- or Knucklehead? Which engine can be combined with which construction style and surface finish? In the end the choice fell on a Panhead engine. We won’t give away the overall picture of the project here, but the tank and engine mount give a good insight.
The fuel tank of most bikes is not only used as a fuel reservoir or as a carrier surface for advertising purposes of the proud manufacturer. The shape of the fuel tank is also decisive for the overall line of the bike.
High up or flat over the engine, large volume with enough fuel for a round-the-world trip or just enough juice to get to the ice cream parlor and back.
The 35th Anniversary Bike gets a shapely teardrop tank (drop-shaped) installed. Welder Mike moves the filler neck to its highest point and aligns it meticulously horizontally. Later a shapely milled part will surround the tank cap like a collar. Two further milled parts cover the tank ends and let the tank merge into the frame in a visually gallant way. The parts are again polished to a high gloss in our polishing shop and then chrome-plated outside the company.
The panhead engine is held by a specially designed engine mount, once again showing the symbiosis of modern and traditional craftsmanship. The beautifully shaped milled parts were designed by our constructor André using a CAD program and milled in our machine park. The round steel arms of the holder were bent and adapted by hand under heat by welder Mike.
The 35th Anniversary Bike is built according to the old Thunderbike tradition “BUILT TO GO – NOT FOR SHOW!” Therefore Andreas deliberately chose a faithful replica engine from Luz Fuhr aka Bill from Motor Technik Mag. This makes the bike a faithful companion in every situation and a long service life is also guaranteed.
Oil Tank, Handlebars, Transmission
When choosing the oil tank, we tested different models from different makes from past eras until the shape was fixed, which you can now see here. It was extremely important to us that the oil tank fits well into the overall picture. The tank was completely handmade by our welder Jörg following a CAD sketch by designer André. The tank will later be embedded in two milled aluminium shells, which are produced according to the same principle in our CNC machinery.
The handlebars are the element that the rider always has in sight . That’s why it should not only do a good job, but also look good, with all its functions.
The handlebars of our Anniversary Bike are an extension of the fork and are bolted to the triple clamp. With its low height it stands relatively close above the fuel tank. We intentionally kept it narrow to keep the silhouette of the bike narrow.
An internally routed throttle cable, our own in-house grips and the noble looking fittings from Kustom Tech reduce the shifting center to a minimum. However, we do allow ourselves a hydraulic clutch, which is why we have a fluid reservoir on each side of the handlebars. The hose for this is laid inside through the frame down to the clutch. The transition from the grip to the handlebars was a bit tricky. With the ring, which we soldered on, handlebar and grips now appear as if they are one part.
The previously presented Panhead engine transfers its power to a new 4-speed Baker transmission in original optics. We have made this choice in order to be able to install a hydraulic clutch. In addition, the transmissions manufactured in the USA are considered to be particularly sturdy and precise in shifting. Although they are reconstructions of the original Harley-Davidson transmissions, they have some technical improvements that turn them into a modern transmission.
Exhaust, Sissybar, Fender
Lucky is the one who has a box of pipe pieces! So you submerged under the workbench, pulled the box forward and, as with the Lego, built the pieces of pipe together, friezed and held to the bike. The only difference is that Lego bricks always fit into each other somehow and we, we play with different metals, walls and diameters. Since we chrome the finished component afterwards, these differences will be completely irrelevant.
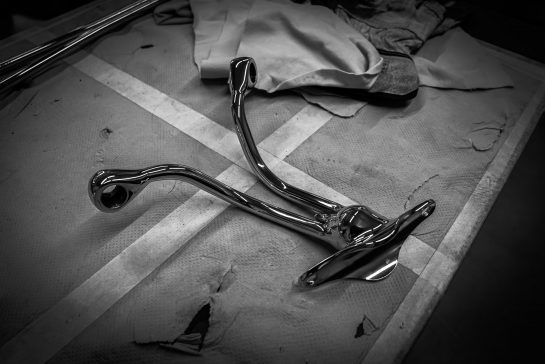
The building of individual exhaust pipes is part of our daily business and depending on the custom bike, sometimes more, sometimes less complex. In this case, there is one particular difficulty: To prevent the exhaust from destroying the narrow silhouette of the bike, it should run inside the frame. The frame is already very narrow, the engine and transmission are fully-grown specimens and the exhaust should be located between? The problem was solved with cut-outs, which we cut into the tubes and closed again with a recess.
We cursed the place where the elbow of the first cylinder runs into the pipe several times and loudly – but in the end we got it under control. It’s especially narrow here, and besides, two different metals that we found in our box with the pipe pieces meet here.
All the work has disappeared cleanly under the chrome. Neither the junctions nor the transitions at the recesses are visible. And between exhaust and sissybar or between exhaust and fender only the famous stamp fits. But without spit.
A little masterpiece is also the Sissybar. We have had it in our hands a thousand times and adapted it again and again. It should – quite clearly – shine in shining chrome. And yet we did not choose steel or even aluminium for the material, but stainless steel. The idea behind this is that we still have an intact sissy bar in case of an unexpected incident. You can remove the chrome, realign the stainless steel and polish it. Et voilá: the sissybar shines like before.
We put a lot of time into this construction! The Sissybar is without a doubt one of the most important elements of our anniversary bike. It belongs on an oldschool chopper and is supposed to attract attention – which is difficult enough on a bike with these thousand details. So it should be especially high and have a nice finish.
Besides the craftsmanship we had to have a lot of patience here. To create a sissybar like this one, you have to measure the construction again and again, adjust it if necessary and check the visual axis again and again. And again. And again. We do that here with digital measuring instruments, wooden slats and with a sense of proportion.
The fender also has a special history. As with other conversions, we used a standard fender, cut it lengthwise and narrowed it down. Afterwards we welded a round edge and closed the transition to the fender nice and clean with tin, so that no open gutter remains.
At the measured points we attached the holders for the sissy bar and the holder for the tail light. Again the motto was: measure, adjust, measure, adjust. In the end all three parts – exhaust, sissybar, fender – fit harmoniously into each other.
A second fender of the same type was also disassembled and narrowed. It has the same dimensions as the first fender and can now serve as a base plate for the seat. We will tell you the story of the seat in our next article. Stay tuned!
Seat
King & Queen in steel and leather
Of course, the seat of our Anniversary Bike is also completely handmade – the seat shell from our team in Hamminkeln, the upholstery and the cover at our trusted leather craftsman: Jimi from Spirit Leather in Düsseldorf.
Jimi has already made individual seats for some of our custombikes. He also plays the big score for our Anniversary Bike, shaping the upholstery neatly and covering it with the finest skin, which he decorated with thousands of needle stitches and sewed together.
Before that we continue with the custom work in Hamminkeln. A second fender, exactly the same as the first one, is to serve as the base plate for the rear part of the seat. The front part is mostly given by the frame. So everything is quite simple?
The crux is in between. It is the transition from the seat to the rear fender. Here a flat plate and curved metal touch each other on exactly the 3 mm that the plate is thick. Such a shortly tacking will not work on a bike that is being ridden.
What to do? Increase the number of connection points and thus increase the contact area. Our welder Maik puts triangles between the two unequal parts and provides stability. He also uses supports at the point where the seat for the pessenger merges into the backrest on the sissy bar.
What is the towel between tyre and fender for? We have positioned it as a placeholder for the leather cover. That’s how close the distance gets. Our anniverary bike is not only supposed to be the narrowest chopper under the sun, it is also built mega-tight all around. The famous stamp.
That’s how it goes on:
The finest leather, carefully selected in a specialist shop for animal skins, will decorate the King&Queen seat and provide seating comfort. Where exactly we will land with the bench, i.e. how exactly the Queen should sit and lean, we will see in the next article.
Finest upholstery and seat cover!
When we were ready with the preparations, we put Jimi the bike with the seat base plate on his workshop in Düsseldorf. After a short discussion, we are of good things and we went home.
One week later we got our anniversary bike back – with a perfectly fitting and lovingly sewn seat. Jimi breathes his special touch into every seat. In this case there are even some nice little gimmicks. We have every reason to be happy about the mega fine result!
Painting
Grandmaster Ingo Kruse from Kamen was again our first choice for this anniversary project. In the course of his about 42 years as a paint artist he has left his mark on countless of our bikes. Often he accompanies our conversions already during the development and get a feeling for what we imagine, before we know it ourselves. That’s why Ingo got our trust also with the Anniversary Bike and surprised us with this paint scheme.
Actually the architectural style already suggests a certain design. Black is an all-time favourite, but do it fit to a 70s chopper with a long fork and sissy bar? Of course not.
Shrill design, rich colour, metal flakes are on your mind when you think of that time. A bit more of everything. Such a bike screams for a strong paint job.
Bam! We are completely flashed from Ingo’s masterpiece. First he brought us the frame and the fork. Bright colors with a crazy depth coming from 15 layers of clear varnish. In some places the paint is darker and accentuates for example the steering head, in other places the paint is more radiant and sets the engine in scene. Thanks to Ingo’s spraying art, even a comparatively thin tube gets a real leading role.
So we were excited about the tank, oil tank and fender. These parts of the bike will be decisive for the whole appearance of the bike. And?
Let’s say it this way: We don’t know how these patterns got into Ingo’s head… but we’re really happy with it! The design of the tank is repeated on the oil tank, the fine lines are also found on the fender. Frame, fork and paint parts – everything seems to be from one piece. Our anniversary bike could not have a better paint job!
Thanks to Jimi and Ingo for their world class jobs!
Badges
The list of acknowledgements needs to be expanded:
When we got the seat from Jimi and the painted parts from Ingo, we already thought that these two gentlemen had crowned our anniversary bike. And yes, they did! Then we got these badges… a handful of precious pieces of brass, wrapped in a cloth, milled, filed, burnished and polished especially for our bike.
The creator is Björn Kremer, who makes engravings with his company BPD in Düsseldorf. Not the kind of engravings you can have done at the funfair “For the dearest grandma in the world” for example. “No, no, no. We only do high-quality one-off productions like this one”.
How do you find such a craftsman who appreciates a foreign project so much that he kneels in and does such a brilliant job?
The leather artist Jimi let him make something from time to time – for example, applications inserted into the seat – that’s where we know Björn from. In the meantime he has already made badges for the seat of one of our customer projects (we’ll show it here soon).
The manufacturing process is very complex and involves many steps. First, a so-called vector file is created from the graphic artist’s design, which is needed for programming the CNC machine. This then takes care of pre-milling from the solid material with a rough milling machine and gives the coin its first shape.
Then a manual work lasting for hours begins. “Everything still looks pretty wild then. The milling marks first have to be sanded away,” explains Björn. The surfaces are optically aligned during sandblasting before he works out the details in a special process. Then the badge is further processed with a semicircular stick wrapped in sandpaper.
The badge then goes into the burnishing bath. In the next step, Björn completes the burnishing effect with the flame. Then a machine is used once again: the polishing machine ensures the shine of the raised areas. The final polish, however, is done by hand again, using a 10,000 grit sandpaper.
At the end, two plaques adorn the brakes at the front and rear, and a large plaque sits on the air filter.
The entire process takes 3-4 hours for a single coin. As with all the other parts of our Anniversary Bike, a lot of time was invested!
With these plaques the last parts have arrived to our major project. We finished building, kicked the engine, adjusted ignition and carburetor, did the first rideouts successfully and with the famous grin on our faces. And now we are working on the film and photo shootings.
Of course you already have a picture of our Anniversary Bike in your mind. How close you are to it, you will find out very soon.
We will present a first trailer next week.
Stay tuned!


